Synology NAS setup MariaDB 5 for PaperOffice

Stephanie Jager
Created: 11.10.2019 1:04 - Updated: 04.09.2020 8:43
Disclaimer : Instructions for third-party software or third-party hardware are only intended as rough assistance or guidelines, are at your own risk and are not a substitute for professional assistance from the respective manufacturer.
Always contact the respective manufacturer directly if you have any questions or details.
We offer you further assistance at https://help-en.paperoffice.com , but note that this does NOT replace in-depth MariaDB/MySQL administration knowledge and is provided without guarantee. If in doubt, you should always use PaperOffice Support to configure your database server correctly.
The Synology NAS setup is very simple and consists of 5 steps.
All the steps are described in the following instructions; you can also see them in our video tutorial by open following HelpDesk entry .
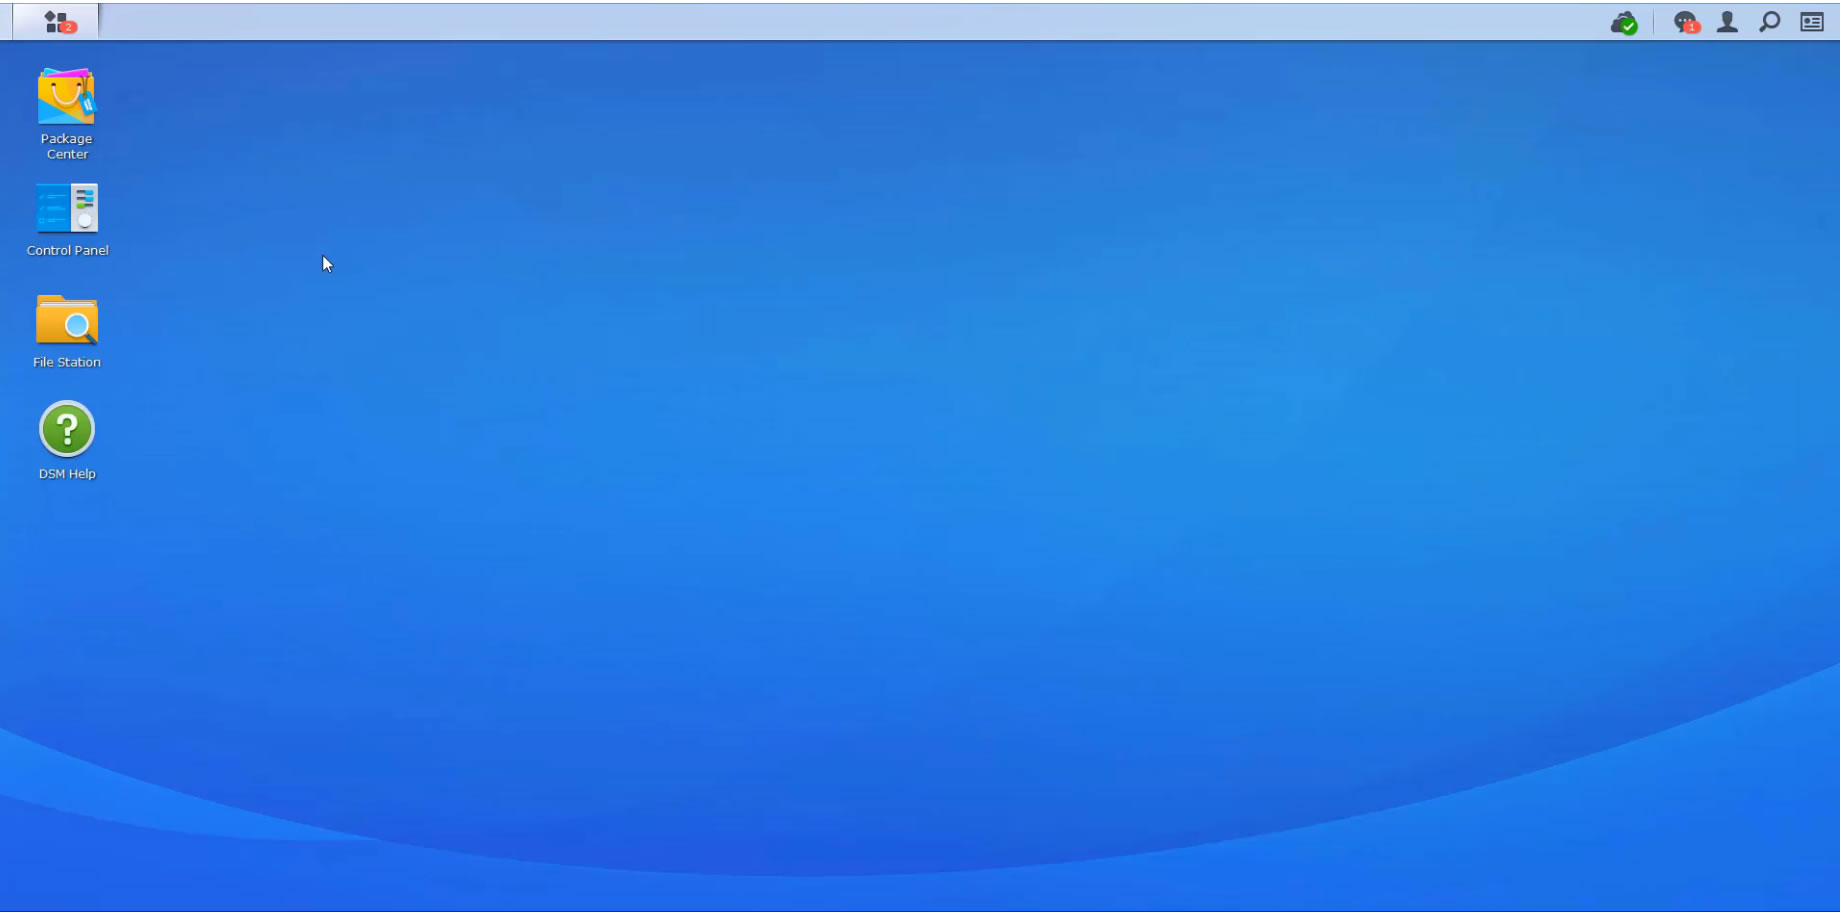
In the following video all steps are described how to set up the MariaDB in Synology and log in to this database with PaperOffice.First, start Synology's Disk Station Manager first and then open the Package Center.
Now select MariaDB 5 and click on the name "MariaDB 5". Please make sure that it is the 5th version of Maria DB.
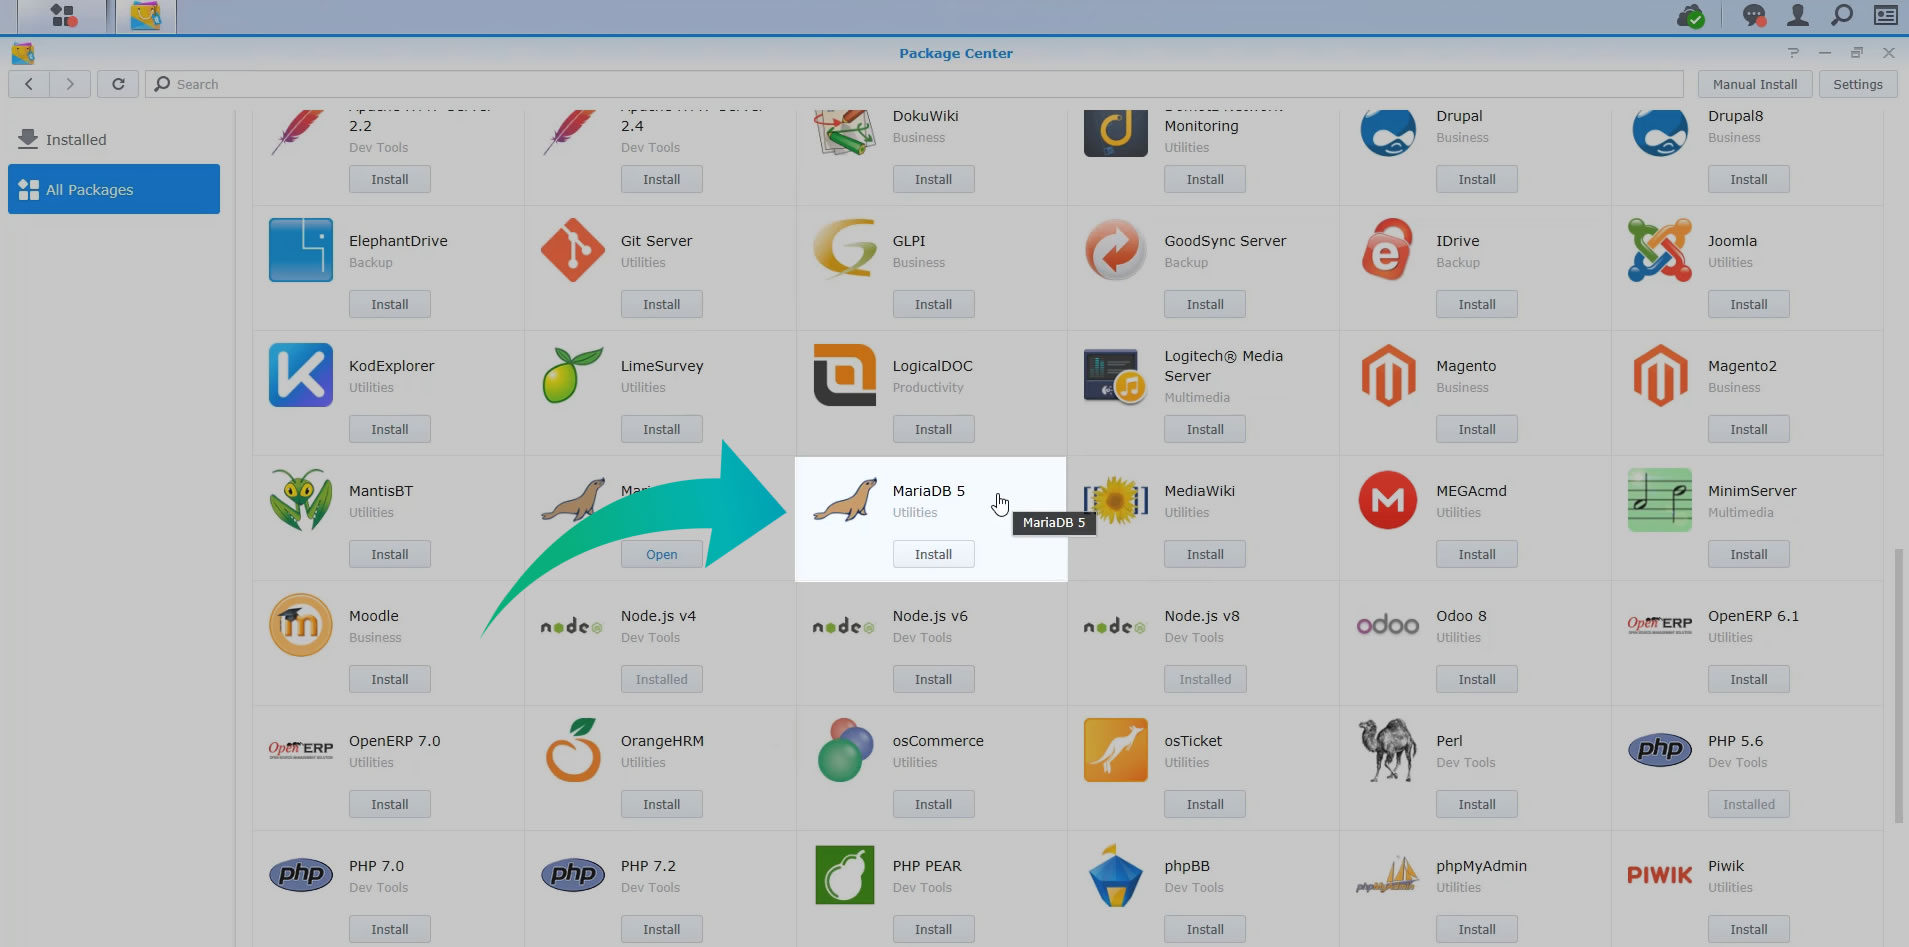
Now select "Install". The loading bar shows you the progress of the installation. After the installation process has been carried out, you will be prompted in the new window to set the root password for the Maria DB.
We recommend defining an identical password as that of your Synology login credentials to make it easier to remember.
Then click on "Next". Now the wizard prompts you to confirm the settings, accept them by clicking "Apply".
Maria DB is now installed.
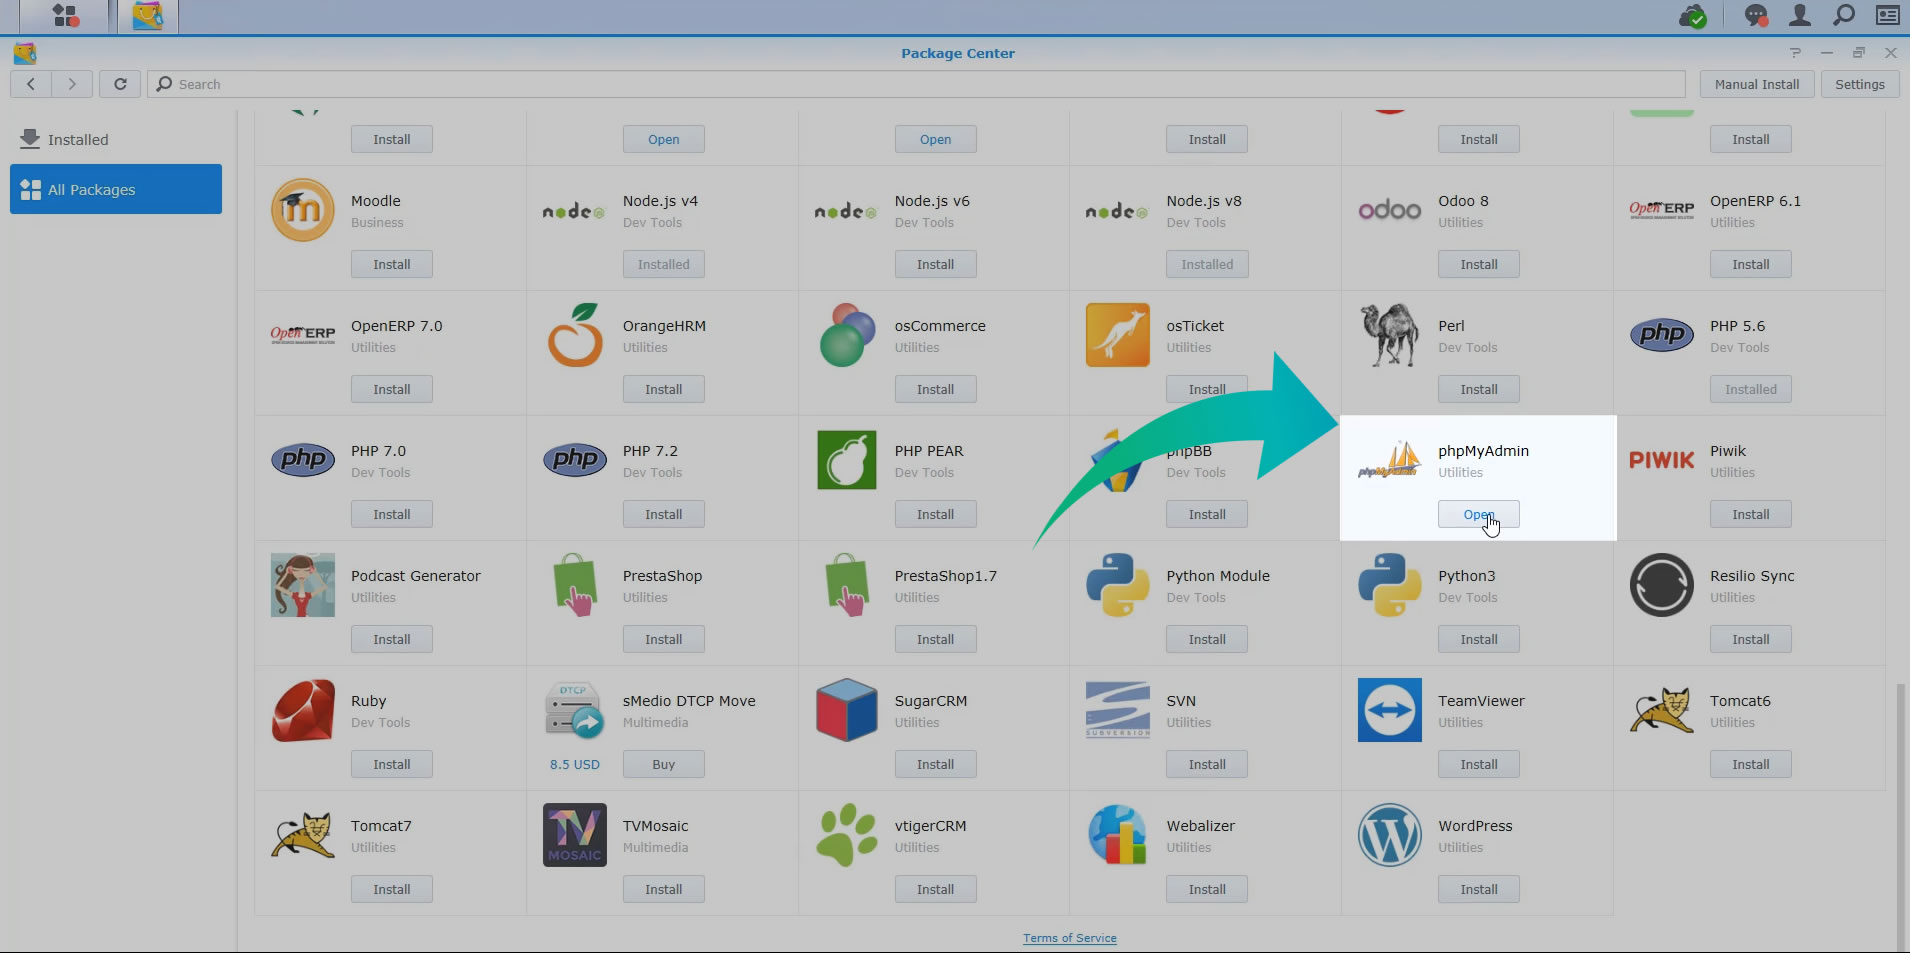
Second: Now go back to your package center and click on the name of the utility “php my Admin”. Install the program. The installation process does not take long.
Then click on "Open".
Third: In the phpmyAdmin login window enter the user name "root" and the password just entered. Confirm the entry with “Go”.
Fourth: Select the “User accounts” tab and then click “Add user account” to create the database user.
This user is required only for the setup, so you can delete the user account after the full installation.
Enter as username and password “paperoffice”.
In the Global privileges area, select "Check all" and then confirm the entry by clicking Go.
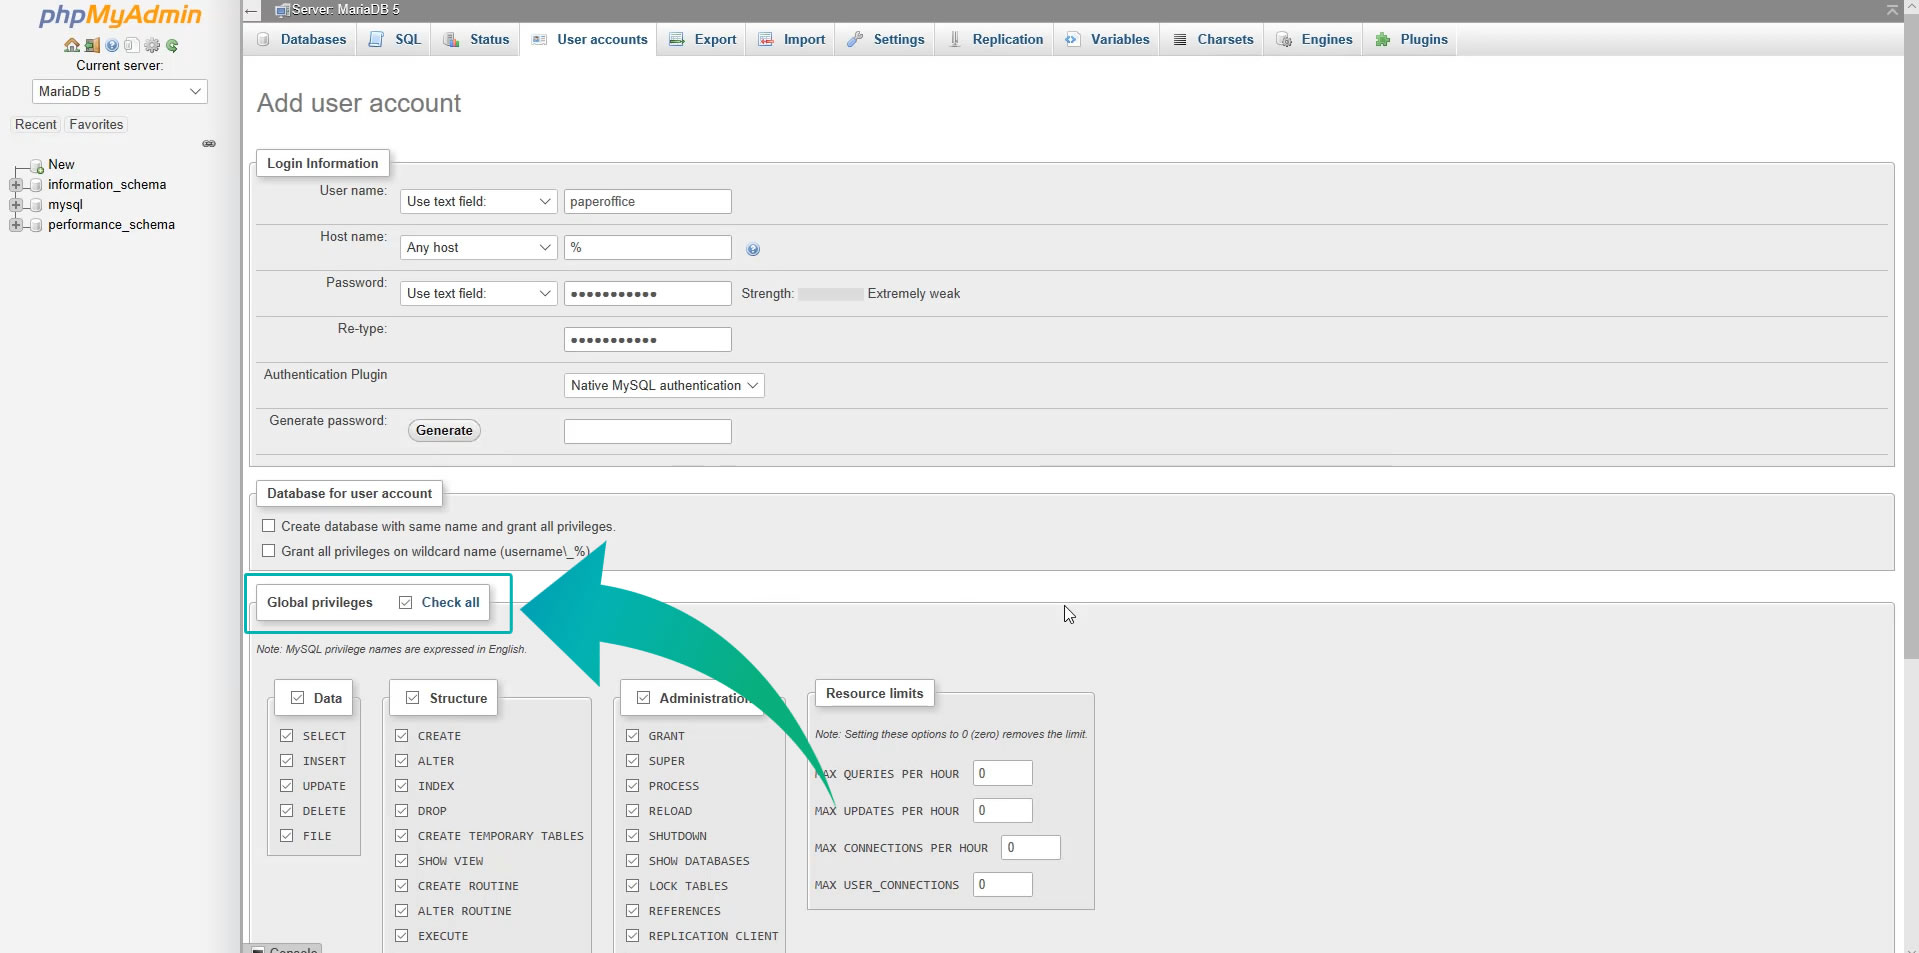
The message above tells you that the user has been added.
This completes the Synology setup.
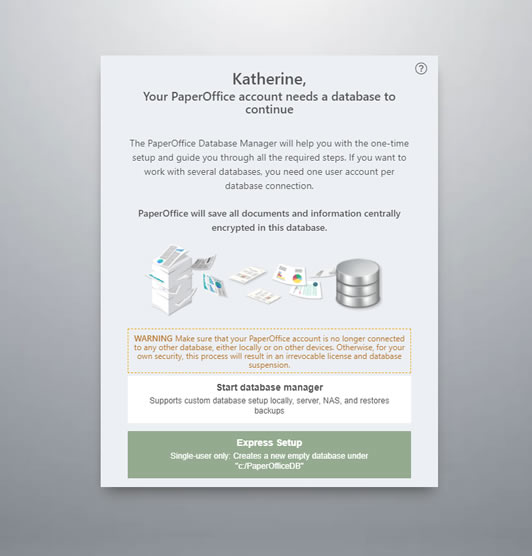
Fifth, start now your PaperOffice and click “Continue” to connect to a database.
Then select "Start Database Manager".
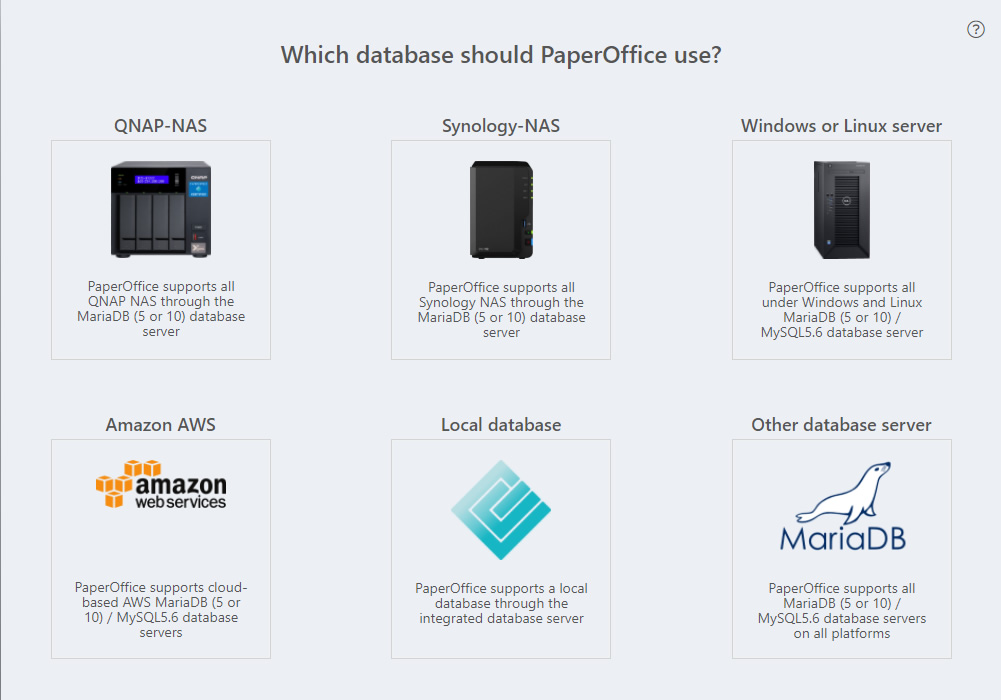
In the next step, select the storage medium "Synology NAS" and click on the corresponding image.
Now select "Create new PaperOffice Database" and enter the IP address of your Synology NAS in the corresponding area in the following step.
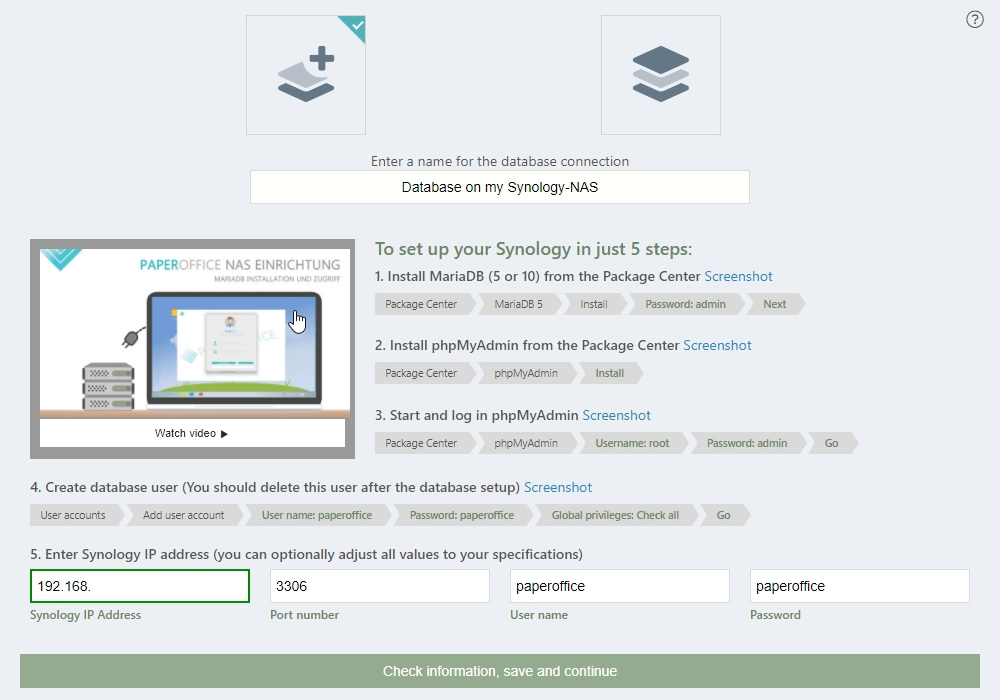
Then click on "Check information, save and continue".
The new PaperOffice database will be created. The process takes a moment.
The next step is to generate the unique Master Keys for the database you just created.
Save them carefully.
After both keys have been saved, click on "Everything ready :) Now we can proceed”.
A new database has been created and you are connected to it.
Click "Continue" to sign up.
PaperOffice now uses the newly created SQL database for the entire storage.
This completes the setup.