How is the PaperOffice surface structured?

Benjamin Kluge
Created: 18.02.2018 8:01 - Updated: 27.01.2021 10:52
The PaperOffice user interface is clearly structured and consist of 7 areas.
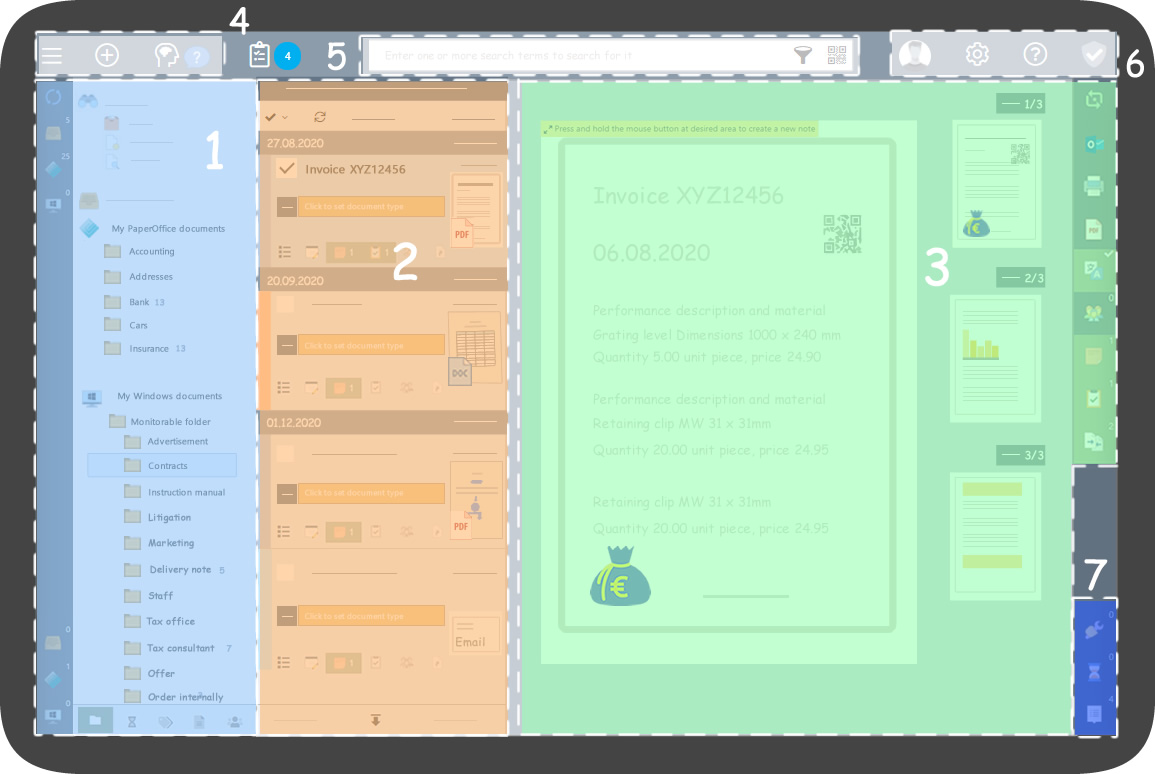
The first area represents the view options.
By default, PaperOffice starts with the "Folder" view and is divided into:
First: "My quick view". "My quick view" section is generated automatically and intelligently by PaperOffice so you have quick access to frequently used documents. In addition, you can mark documents as “Favorites” or put them on a “Watchlist”, if you need them quickly and easily at any time.
PaperOffice interface always starts with your "Recently added" documents.
Second: "My PaperOffice Documents" and "My Windows Documents".
The PaperOffice folder structure supports a hybrid mode that combines the best of both worlds - data storage in the PaperOffice SQL database as well as data storage in the Windows file system through virtual mount of Windows folders.
The exact differences of hybrid mode in the folder list are described in our other videos.
"Common PaperOffice documents", as well as "Common Windows documents", are only relevant, if you are working within the network.
All folders that are stored under "My PaperOffice Documents" and virtual mounted under "My Windows Documents" are not visible in the network.
And all folders that are stored in “Common PaperOffice documents” and virtual mounted in “Common Windows documents” are therefore visible in the network.
You can simply drag and drop folders within each mode to organize them.
Each folder can also be assigned individual release levels for specific users if the folder is available on the network but should not be visible to everyone.
The icons to the left of the folders are used for quick navigation.

Simply click with the left mouse button on the corresponding symbol, e.g. "My Inbox", "My PaperOffice Documents" or "Common Inbox" and the folder list scrolls to this main folder.
The icon at the top updates the folder list - reads in all folders again and updates the folder view.
Right-click the folder to open the context menu for the selected folder.
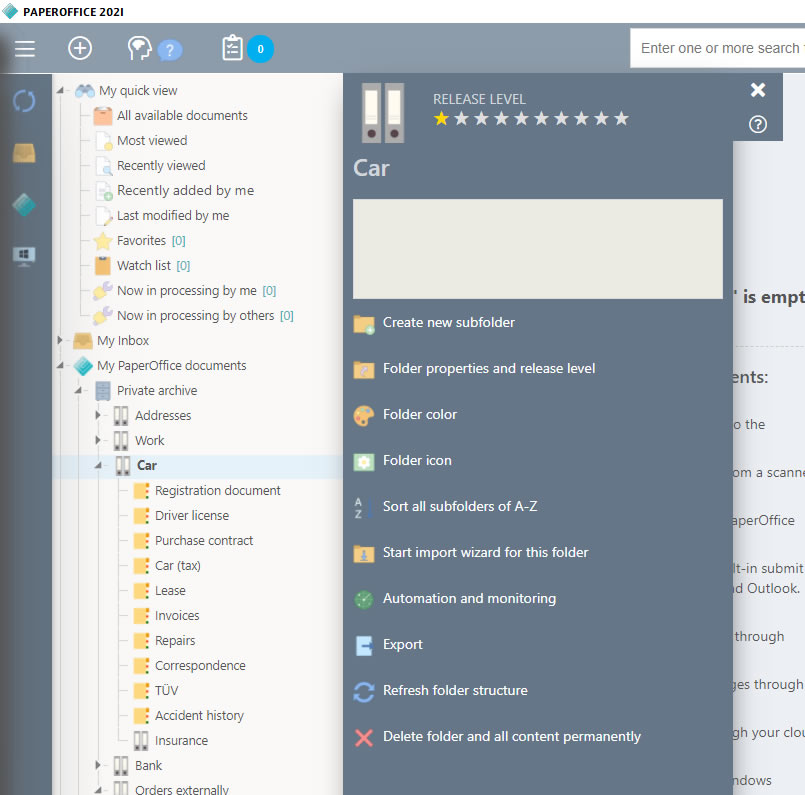
Here you can edit the folder properties as well as adding remarks and comments to the folder, changing the folder symbol or adding a folder color and all documents that are in this folder can be exported from PaperOffice.
Another click with the right mouse button or a simple click on the "X" symbol closes the context menu.
Viewing options
PaperOffice supports various viewing options.
This area consist a total of 5 different display options.

The view, which is set by default to "Display by folder", can also be changed by status, keywords, document type and contacts. Thus, all documents are listed according to the status entries.
Click on the corresponding icon below and change the view.
Document list
The document list displayed in the 2 area lists the documents stored in the currently selected folder.
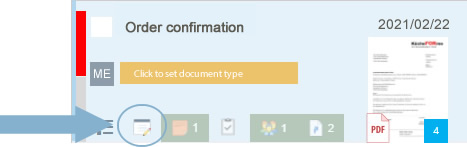
The document entry in the document list already contains all possible information about the document.
To add a note to the document, left click on the document preview and drag in the area for which you want to save a note.
You will find detailed instructions on this in a separate topic.
This is how you can see from the green tag next to the corresponding symbol that a document contains a note.
As a result, added notes, tasks or contacts are already highlighted in the document list.
Since documents for the actual storage folder can also be displayed virtually in any number of other folders without creating duplicates, you can see from this symbol if this document has virtual folder links.
The thumbnail of the 1 document page helps to recognize the document immediately at first glance.
You can view or edit the properties of the selected document by clicking the corresponding icon with the left mouse button.
Or simply call up the entire context menu of the document by clicking with the right mouse button on the corresponding document entry and then selecting any entry, such as "Document properties".
Tabs with different sections representing the properties of the document are displayed and can be selected by you.
You will find detailed instructions on this in a separate topic.
Which settings you can make under document properties and what the various tabs mean as well as which document data has already been recognized, read out and automatically stored by the integrated AI are described in detail in a separate article in the HelpDesk. You will always receive explicit instructions in our HelpDesk by clicking the "question mark symbol".
Close the properties window by clicking on "X".
Document preview
In the 3 area – the document preview all document pages of the selected document are displayed in the preview. You can switch between the individual pages by clicking on them with the left mouse button.
The icons in the 3 area, which are located to the right of the document preview, give you access to further options of the current document or the selected document page.
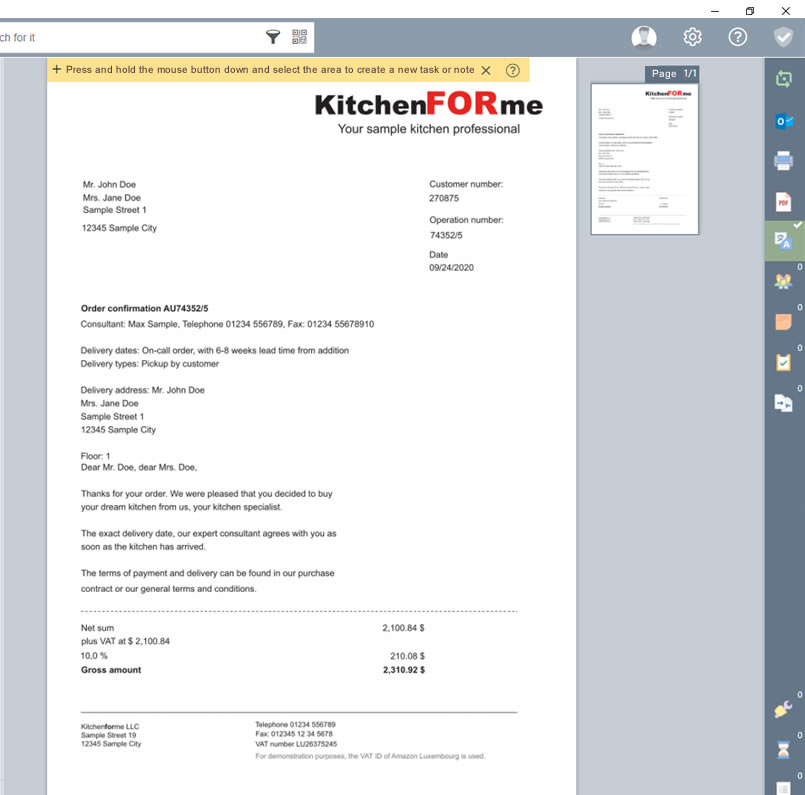
Whether rotating the document preview by 180 degrees, sending it with Outlook, printing it, opening it in PDF format, the recognized text on the document page, contacts associated with the document, notes and tasks on the document and versions - the most important document elements are displayed here at a glance and can be edited by clicking on the corresponding element.
In the 4 area you can call up various menu options using the top menu bar. Behind the individually callable main points hiding further functions, which you will use in your daily work with PaperOffice.
1. In this way, you can use the first button to display a further module selection. You can edit the currently selected document with the editing tool WorkBench as well as general notes and tasks, password manager PasswordSafe, calendar view, contacts and data backup.

2. Using the "Add" button, which is marked as a "Plus" sign, you can add and edit a document copy of the currently selected document to WorkBench, you can use your scanner to add "Paper documents". Using the print command and the integrated virtual printer called PrinterConnect, you can easily print your documents virtually in PaperOffice. Add files via drag & drop, capture screenshots using ScreenCapture, archive web pages and set up folder monitoring.

3. Various storage modes are hidden behind the next symbol.
Because PaperOffice can automatically recognize all your documents thanks to the AI-based intelligent storage, as well as index them, read out the entire content and then store them fully automatically in the correct destination folder.
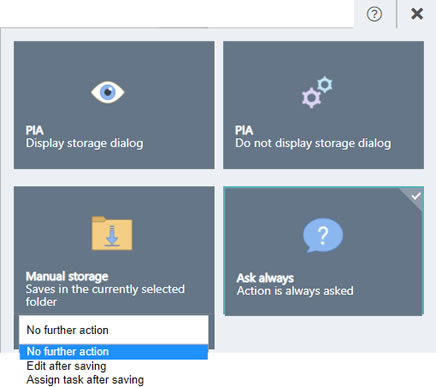
The AI "PIA" - "PaperOffice Intelligent Automatization" integrated in PaperOffice ensures intelligent storage.
How to learn in documents and assign storage masks is explained in a separate video or by calling our HelpDesk with the topic.
Briefing
PaperOffice always launches the interface with your personalized daily briefing. Here you can see whether today or the next 14 days documents and tasks on resubmission, due date or completion have been put to remind you.
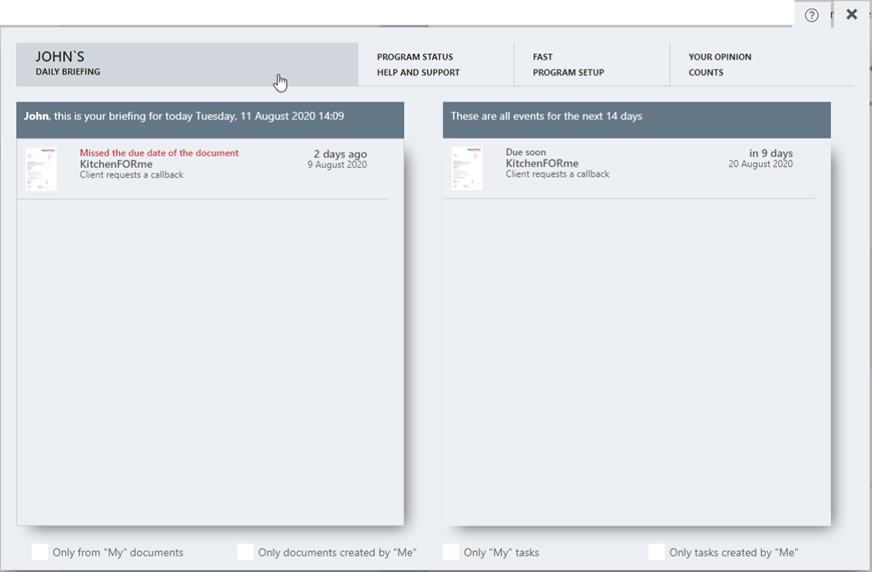
You can also access other functions from this, such as "Help and Support" and "Quick Setup", or simply give us your opinion on PaperOffice by sending us your smile or a frown. We would very much appreciate your opinion and always look forward to your feedback.
In the 5 area you will find the innovative and intelligent PaperOffice search bar.

All information stored in PaperOffice will automatically be searched, such as document name, text, stored document data or information from user-defined fields, folder name and comments on the document.
In addition, you always have a clear overview of the recently added documents and folders, just click in the search bar - the overview is displayed automatically.
To activate the search simply enter the search term in the search bar - PaperOffice performs an immediate live search. It also shows where the search result is located.
PaperOffice search results are automatically sorted by date - the most recent documents, emails and folders appear at the top.
In order to narrow down your search results or to carry out advanced export actions, simply click on the " Switch to advanced search / filter / export" button. Here you can use the filter settings to limit your search results and then pass them on to your tax advisor, for example.
Exact instructions on how the quick search or the advanced search with filter settings work can be found in a separate HelpDesk entry or video.
The 6 area includes user management and settings.
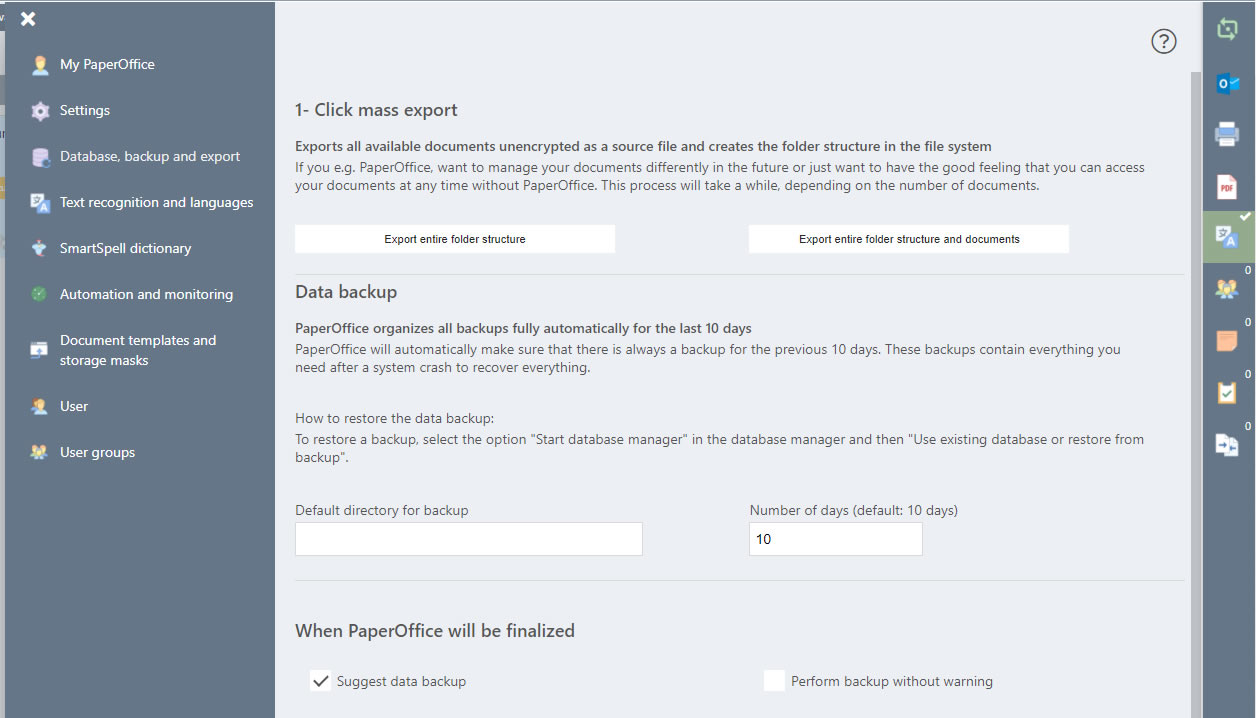
PaperOffice has built-in data backup and automated data recovery feature to restore all data in the shortest possible time, even after a total computer crash, providing 100% security.
As well as the 1-Click Mass Exporter - PaperOffice can export all of your data and its folder structure at any time with just a click of the mouse if you no longer want to use PaperOffice, need documents unencrypted, or simply want to feel independent.
PaperOffice supports you with the integrated intelligent help system in the best possible way and adapts to the content displayed. Simply click on the question mark to display the help. The question mark is displayed for every module and every view.
How you perform Backups or manage user information or manage Document templates as well Storage masks is explained in separate HelpDesk topics.
The 7 area includes system notifications.
All documents that are currently being processed are listed under the first symbol at the top. For more information, see this Topic.
The second symbol shows documents in processing. So you can see what is being done at this moment this Topic.
Under the third symbol, the notifications, everything is listed in case you missed an important notification at that moment. In this way, you can see at a glance whether and when the text recognition and preview images were created. For more information, see this Topic.