Perform database migration from MariaDB 5 to MariaDB 10 for Synology NAS upgrade to DSM 7

Katharina Reinhardt
Created: 03.08.2021 8:14 - Updated: 03.08.2021 8:14
Disclaimer : Instructions for third-party software or third-party hardware are only intended as rough assistance or guidelines, are at your own risk and are not a substitute for professional assistance from the respective manufacturer. Always contact the respective manufacturer directly if you have any questions or details.
Direct Synology Link for the database migration.We offer you further assistance at https://help-en.paperoffice.com , but note that this does NOT replace in-depth MariaDB/MySQL administration knowledge and is provided without guarantee. If in doubt, you should always use PaperOffice Support to configure your database server correctly.
Synology NAS upgrade to the DSM 7, can only be done using the MariaDB 10. DTo do this, you have to install MariaDB 10 and carry out the following steps. Only after that steps as well after the connection to the MariaDB 10, the old MariaDB 5 can be uninstalled.
Step 1- Find out the access data for the database
First of all, we need the access data, such as the username and password, from the database.To do this, you must first disconnect the database connection.
Please start PaperOffice and before log in, click on "Options", then "Continue and manage database connection". In the next step, the disconnection is confirmed by clicking on "Disconnect the database connection".
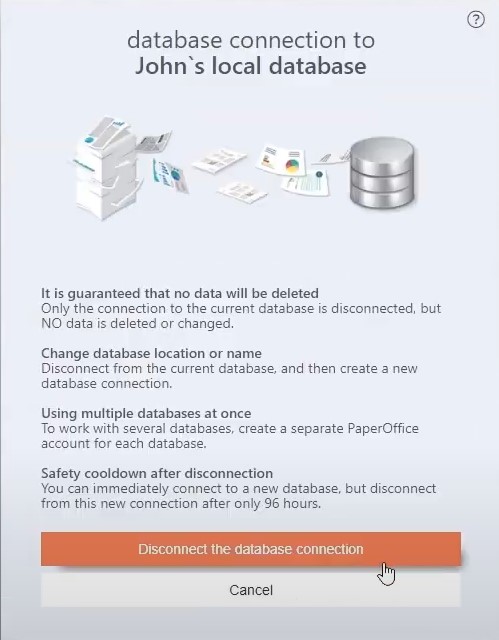
The connection was successfully disconnected and now we have to click on "Next". In the next step, click on "Start Database Manager" and select Synology NAS by clicking on the image.
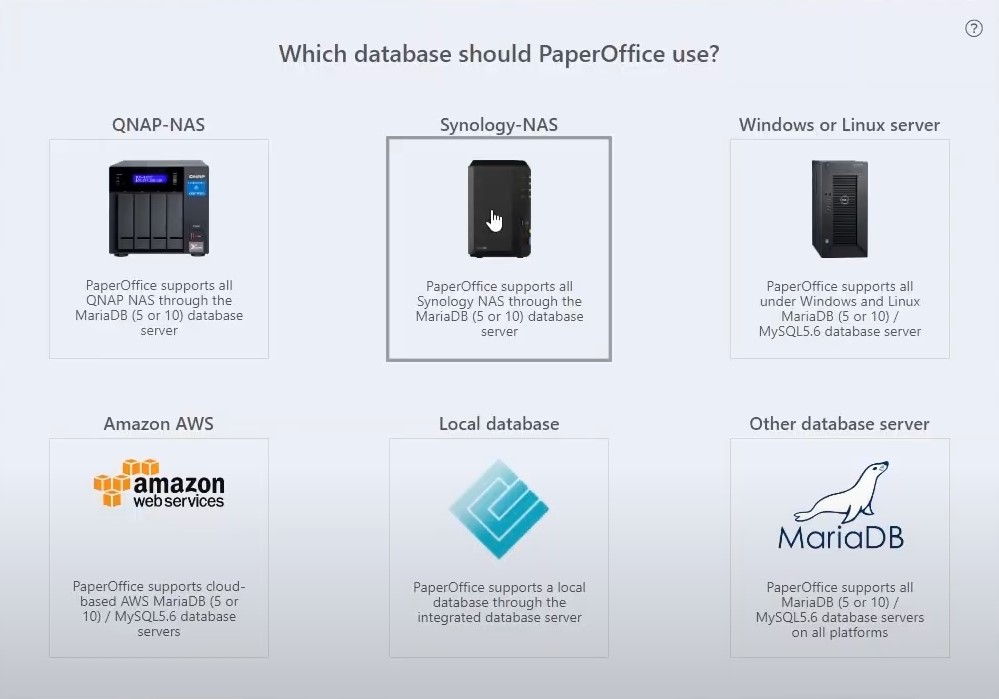
In the next step, enter the IP address of your Synology NAS and the port number "3306" is that of my MariaDB, then click on "Check details, save and continue".
Now you have to select the MasterKeys and in the next step you can display the access data required for the migration by checking the box next to “Display database access data”.
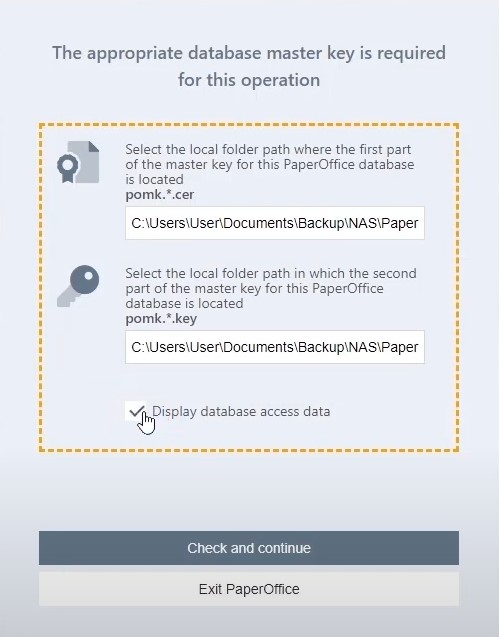
Confirm your entry by clicking on "Check and continue". A window then opens with the access data for MariaDB 5.
This data you have to copy because you will need it later.
It is best to copy this into a text file.
After the data has been saved, close the PaperOffice information window by clicking "OK" and you are now connected to the database.
Step 2- Back up data from PaperOffice
The next step is to back up the data from PaperOffice. This is necessary for the migration, if you are on MariaDB 10, we recommend that you use the HyperBackup app from Synology to carry out the daily data backup from HyperBackup.
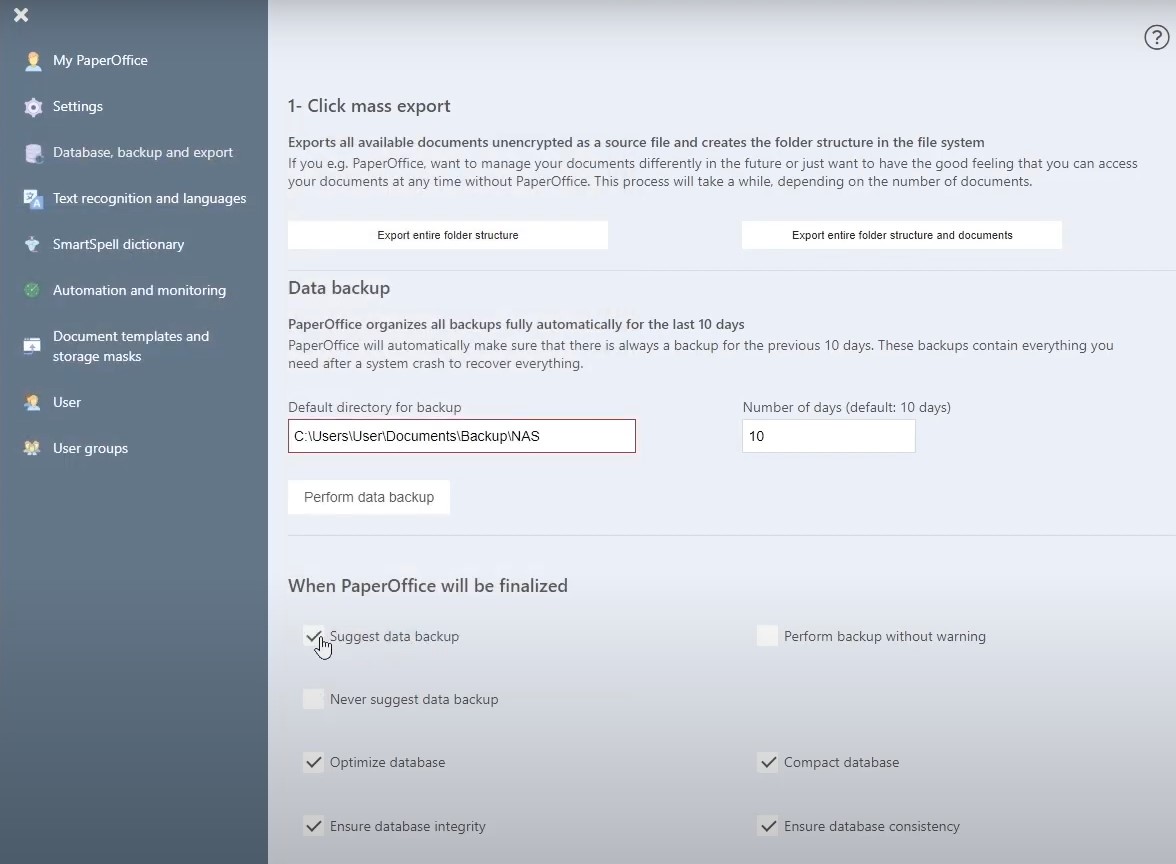
To do this, log into your PaperOffice, go to "Settings" and select the "Database, backup and export" tab. In the "Data backup" area, select the data backup folder.
Keep the option "Suggest data backup" under "When PaperOffice is closed" and save the changes.
Now quit PaperOffice and you get asked whether you want to back up the data. Confirm this with “Yes, do it”.
The data backup is now being carried out; the process takes a short moment. PaperOffice then closes automatically. This completes the second step.Step 3 - Install the MariaDB 10 database and add the user account
To do this, log into your Synology, still on the DSM 6, and go to the Package Center to install the MariaDB 10.
Select the option “All packages” on the left and enter “maria db” in the search field.
Then click on “Install” under the “MariaDB 10” program you found to install it.

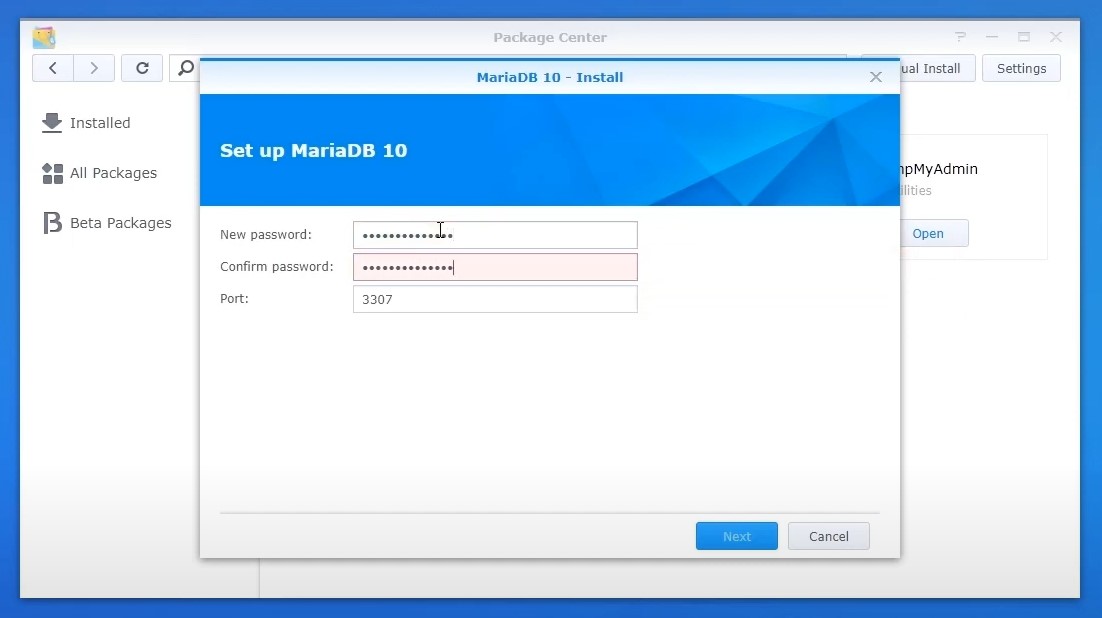
First of all, enter a new password for the MariaDB 10 and confirm this in the next field. Leave the port on "3307". Then click on “Next”.
And confirm the settings by clicking on "Apply". The process may take a moment.
The installation is then completed when the "Open" button under MariaDB 10 is activated.
Click on the package that has just been installed and then on "Open".
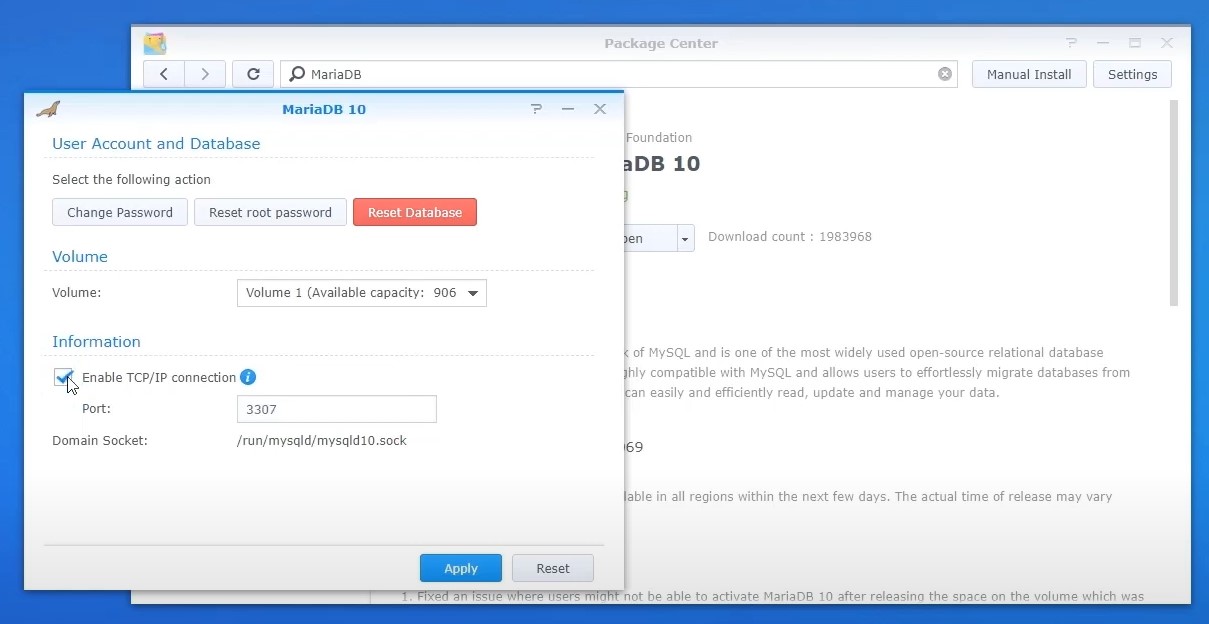
Now it is very important that under “Information” next to “Enable TCP/IP connection” a tick is set.
The next step is to go to installed packages, on the left, and open “phpMyAdmin” to log in with the new MariaDB 10 database.
Click the selection list and select the appropriate entry.
Now enter the username “root” and the password and confirm the login with “GO”.

The next step is to create the database schema and create the user account. For this we need the information copied from PaperOffice.
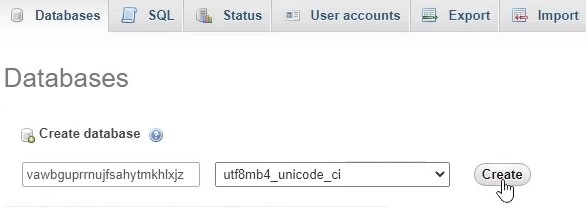
Go into the text file, copy the database name out and select the "Databases" tab.
Under "Create database" paste the database name just copied into the corresponding field. Click in the selection list on the right and select the entry "utf8mb4 unicode ci" at the very bottom, as shown in the image, and click on "Create".
Now go back by clicking on the "Home" symbol and select the "User Accounts" tab to add a new user account.
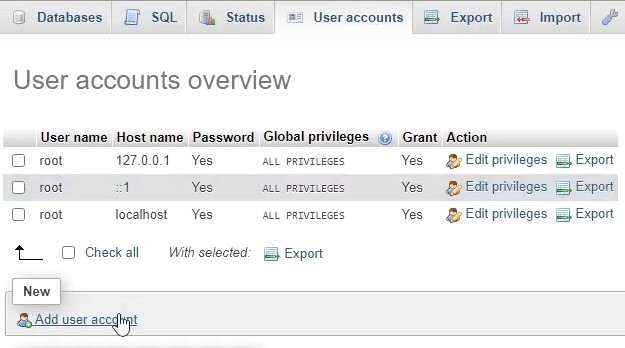
To do this, click on “Add user account”, copy the user name from your text file and paste the name into the appropriate field.
Carry out the same process with the password from the text file, and also insert the password under "Re-type".
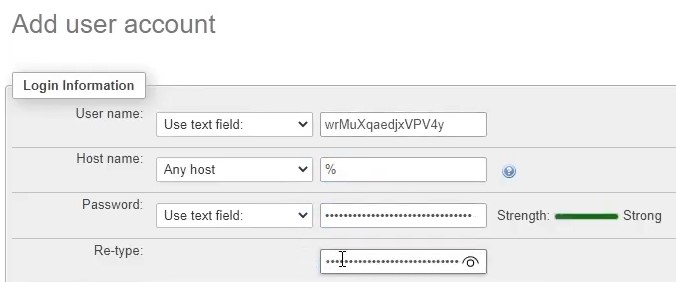
After this step you have to make sure that "Any Host" is selected under Hostname and that the checkmark next to "Check all" has been set under "Global privileges".
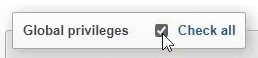
Then finish the process by clicking "Go".
PhpMyAdmin can now be closed.
Step 4 - Start database migration
Now we can start with the database migration. We recommend using MySQL WorkBench for this.
It is very important to note: Install version 8.0.26 of MySQL WorkBench, not the latest.
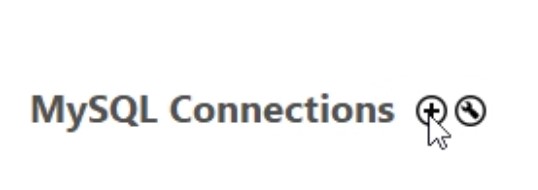
After MySQL WorkBench has been installed, open it.The first step is to establish a connection to the database.
To do this, click on the “Plus” symbol next to “MySQL Connections” and
The connection method remains the same “Standard TCP / IP”.
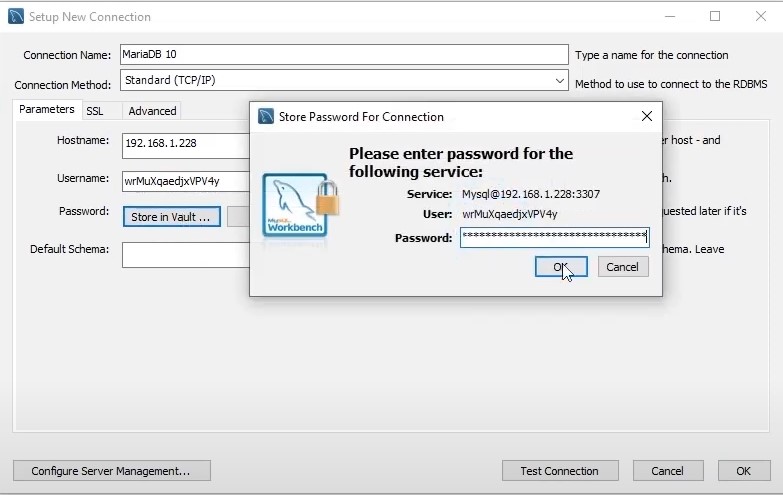
In the Hostname input field, I enter the IP address of the Synology NAS. The port must be changed to „3307“ here.
Next to "Username" I enter the user name from my text file and in the next area "password" I store the password, which I also copy from the text file and after clicking on "Store in vault" paste it into the corresponding field.
Now I can test the connection and check whether the data has been entered correctly by clicking on "Test connection". So I can immediately see that the connection has been successfully established and confirm the message with "OK".
After the successful connection test, I save the configuration by clicking on "OK".
The connection that has just been saved is listed, I click on it once and the window with various editing tools opens.
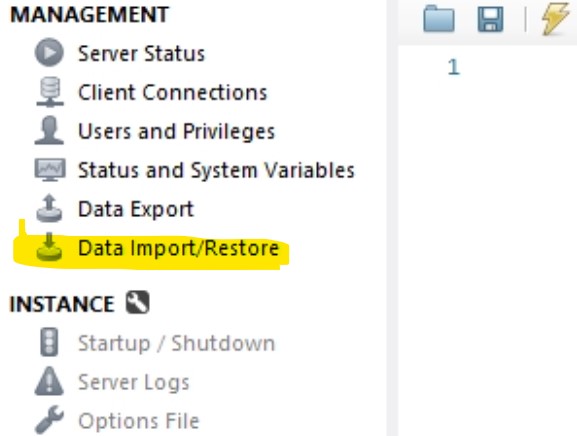
Now the step of integrating the previously created data backup takes place.
To do this, I click on the entry “Data Import / Restore”

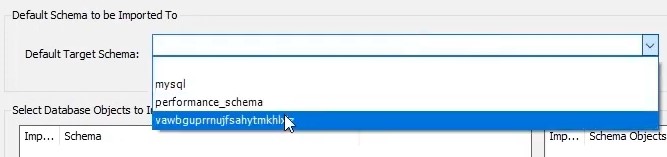
After the file has been selected, we must define to which target schema should be imported. To do this, I click in the selection list, select the database name and click on “Start Import”.
Please note during the import process:
If the first attempt fails and you see the error with the designation "max allowed packet", the necessary environment variables may not have been initialized by your database. Start the process again by clicking on "Import again".
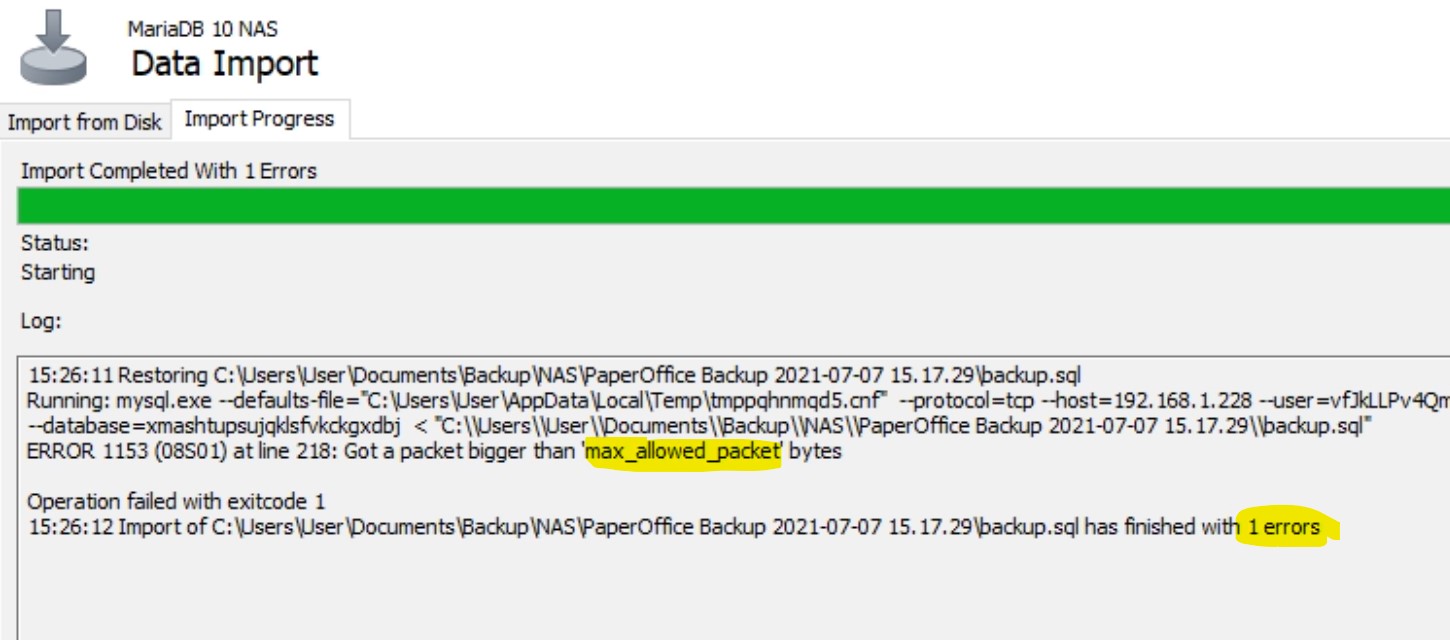
An “Import completed” notification will appear when the import is complete. Which in turn means that the data backup has been integrated and this window can be closed.
As the last step, start PaperOffice to disconnect from the MariaDB 5 for the time being and then connect it to the new MariaDB 10.
As already described before - disconnect the database connection. (Options -> „Continue and manage database connection“ -> „Disconnect the database connection“)
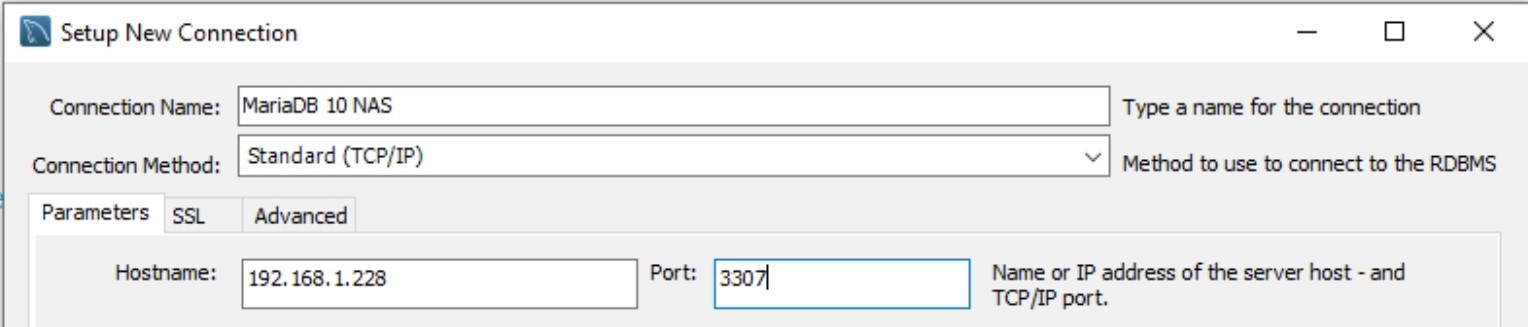
After the connection has been disconnected, click in your PaperOffice login window on „Continue“, choose "Start database manager", then „Synology NAS“ and „Integrate existing PaperOffice database“. Enter the IP address of the Synology NAS and, very importantly, change the port number to 3307, because MariaDB 10 is running on 3307.
Click on "Check information, save and continue" to complete this step.
Then you have to select the MasterKeys of the database and confirm the entries by clicking on "Check and continue".
The connection to MariaDB 10 is now established.
The database migration is now considered as complete.
Step 5 – Uninstall MariaDB 5
After PaperOffice has been connected to the MariaDB 10 database, the old MariaDB 5 can be uninstalled.
To do this, go to the Package Center and select "MariaDB 5" under installed packages. In the next step, click on the right arrow next to the "Open" button and select the "Uninstall" entry.
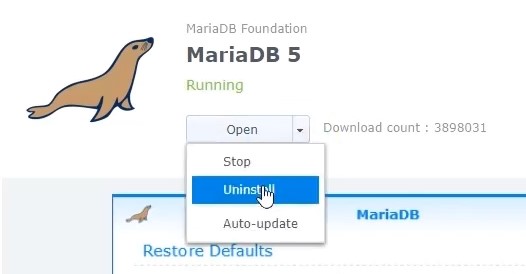
Confirm the next security question by clicking on "Next". Check the box next to "Remove MariaDB databases" and then click on "Apply". The package that is no longer required will now be uninstalled.