How can I create and manage stamps in PaperOffice and carry out automatic actions, workflows with stamps? Assign user rights to stamps?
.

Dennis Schulze
Created: 17.02.2022 4:38 - Updated: 09.03.2022 17:05
The use of stamps and automatic actions triggered by stamps is available from the PaperOffice 2022 version.
Stamp Management
In the stamp management screen, you can easily create new stamps, edit existing ones or delete them.
With every new installation, PaperOffice generates predefined stamp entries such as "Rejected", "Paid" or "In a hurry", which you can use or remove at any time.
Create a new entry:
Click on the "Create new entry" button to create a new stamp.
Enter the name of your new stamp under the Label (Visible) label. This designation is displayed in the stamp list and is visible to all employees of the network.
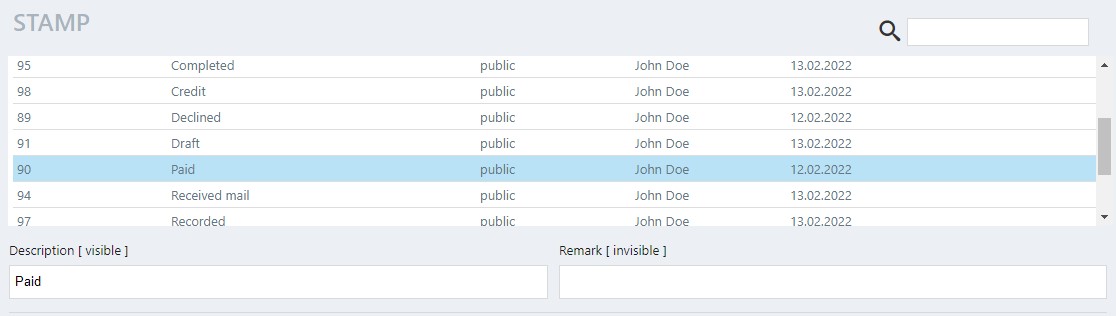
You can optionally add a comment, which is only visible in the stamp administration mask and is displayed in the table next to the name on the right.
Save your entry by clicking on "Save current entry".
Of course you can cancel the process by clicking on "Cancel", your entry will not be saved.
Use Stamp Designer:
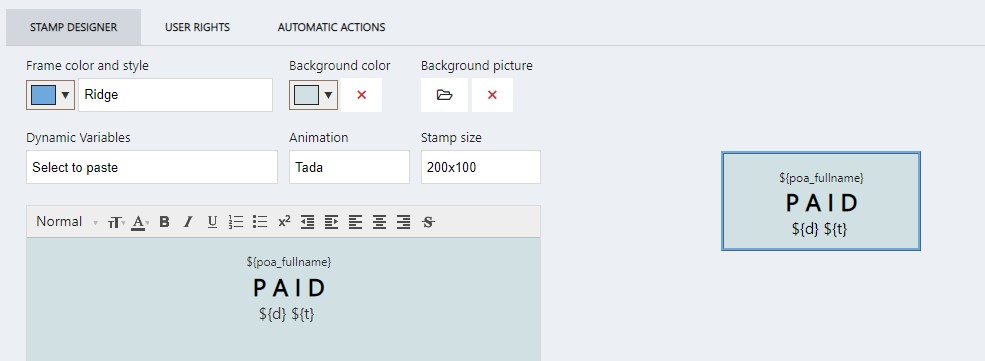
Frame color and style: Store the color of your frame here by clicking on the color picker and selecting a specific color.
If you don't want to use a frame, click in the selection list and select the first entry "None".
In addition, you have other frame styles available, such as:
- Dotted
- Dashed
- Solid
- Double
- Groove
- Ridge
- Inside
- External
Background color: Specify the background color of your stamp here by clicking on the color picker and choosing a specific color. If you want to use a transparent background, click on the "X" symbol.
Background image: If you already have certain stamps, you can upload them here. Store your own logo here by selecting your personal picture. Clicking on "X" discards the selection.
Dynamic variables: Here you can store dynamic variables. Left-click in the selection list.
- "User Account" - If this variable is selected, the stamp (once used on the document) will display the user account of the person who added this stamp.
- "Username" - If this variable is selected, the stamp (once used on the document) will display the username of the person who added this stamp.
- "User First Name" - If this variable is selected, the stamp (once used on the document) will display the first name of the person who added this stamp.
- "User Last Name" - If this variable is selected, the stamp (once used on the document) will display the last name of the person who added this stamp.
- "Current Date" - If this variable is selected, the current date will be displayed in the stamp (once used on the document).
- "Current Time" - If this variable is selected, the current time will be displayed in the stamp (once used on the document).
Animation: By clicking in the selection list you can define different animations for your stamp. This animation is performed on the stamp when the document is retrieved. If you don't want to use animation, select "None".
Stamp size: By clicking in the selection list you can specify different stamp sizes.
Text: In the "Text" area, you can store the stamp text. Extensive editing tools are available to you for this purpose.
All changes under "Stamp Designer" are shown live in the right preview image.
Store user rights:
Under the "User rights" tab, you can set the rights.
So you can define here, "Who stamped..."
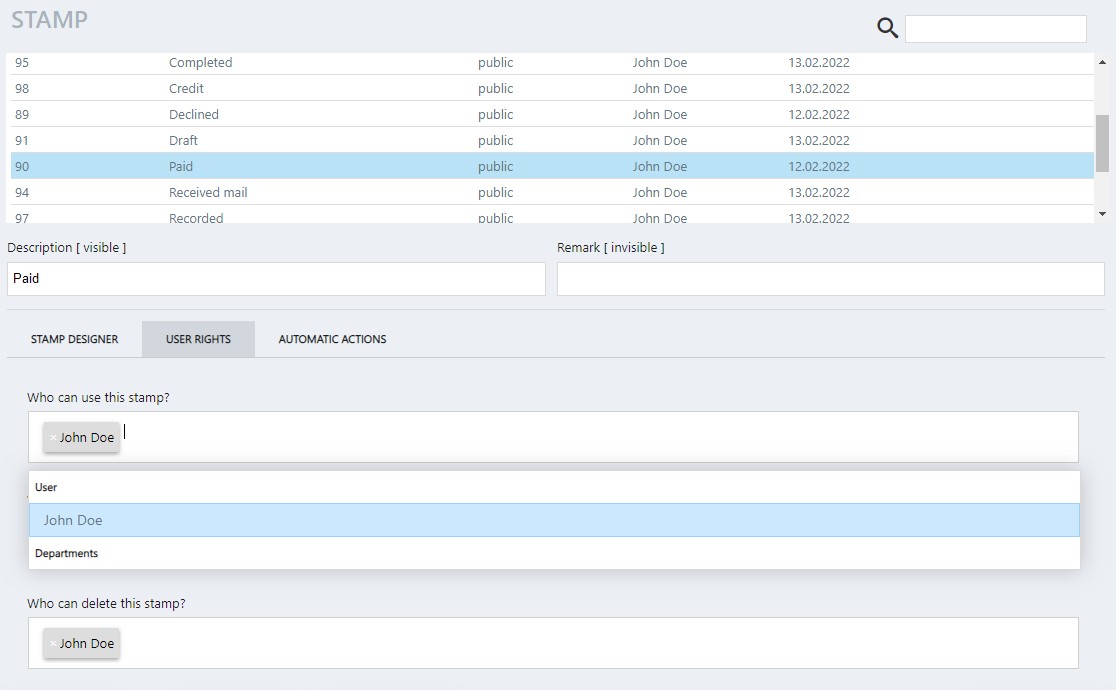
- Use
- See
- Delete
- Move
Perform automatic actions:
Under the "Automatic Actions" tab, you can specify what actions should be taken when this stamp is placed on the document.
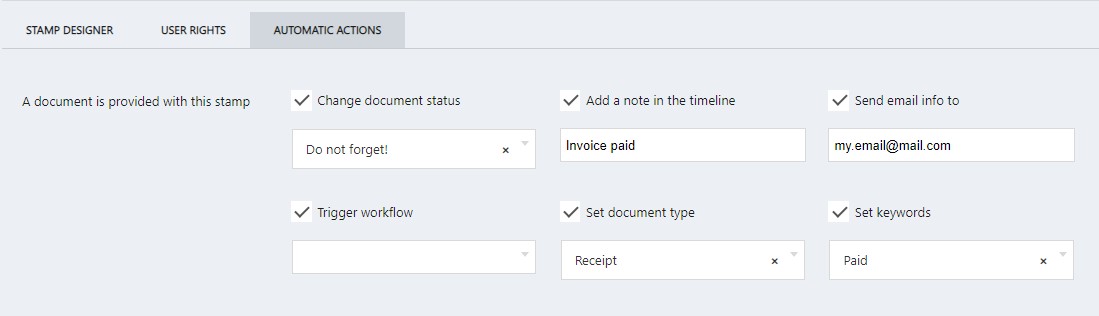
Change document status: Place a tick next to "Set document status" and in the next step select a status entry from the list. This is how the document gets this status entry when the stamp is placed on the document.
Add note to timeline: Check the box next to "Add note to timeline" and enter any information about it below. If the stamp is placed on the document, a general note with this information is automatically stored for the document.
Send email info to: Place a tick next to "Send email info to" and enter any email address below to which an info will be sent as soon as the stamp is placed on the document.
Trigger workflow: Place a tick next to "Trigger workflow" and select a workflow from the selection list. As soon as the stamp is placed on the document, this workflow is triggered.
Specify document type: Place a tick next to "Specify document type" and in the next step select a document type from the list. This is how the document gets that document type when the stamp is placed on the document.
Set keywords: Place a checkmark next to “Set keywords” and in the next step select a keyword from the list. So the document gets that keyword when the stamp is placed on the document.
Delete existing entry:
Select the entry you want to delete and click on it in the management table.
Then click on the lower button "Delete selected entry" to delete it and then confirm the security query with "Yes, delete and remove".
Save as new entry:
If you want to duplicate an existing stamp, you can first select an existing entry in the list, edit it and then click "Save as new entry". This is how a standalone entry is saved.
Search for entries:
You can search within the administration mask for entries that have already been created by clicking on the right, next to the magnifying glass,

Enter the term you are looking for. A live search of your entries will be carried out.
Delete existing entry:
Select the entry you want to delete and click on it in the administration list.
Then click on the lower button "Delete selected entry" to delete it and then confirm the security query with "Yes, delete and remove".