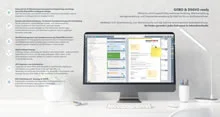
How are storage masks created and when are they executed?
Thanks to the AI-based Intelligent Storage, PaperOffice can automatically recognize all your documents as well as index them, read out complete content and then automatically place them in the correct destination folder.
Required fields are filled in automatically, documents are automatically provided with document information, linked with contacts, notes are saved and all other automated procedures are taken care of for you.
Intelligent storage is provided by the PaperOffice integrated AI "PIA" - "PaperOffice Intelligent Automatization".
In order to automatically store your documents and receipts, the document template must first be defined or the document learned.
The storage masks in PaperOffice provide the keywording and the storage location.
Learning in the templates is very easy and will be explained in another workshop described and explained in detail in a video, which you can find in our YouTube Channel.
As soon as a learned-in document template has been recognized, a storage mask is automatically triggered, which is responsible for the automated keywording and the storage location.p>
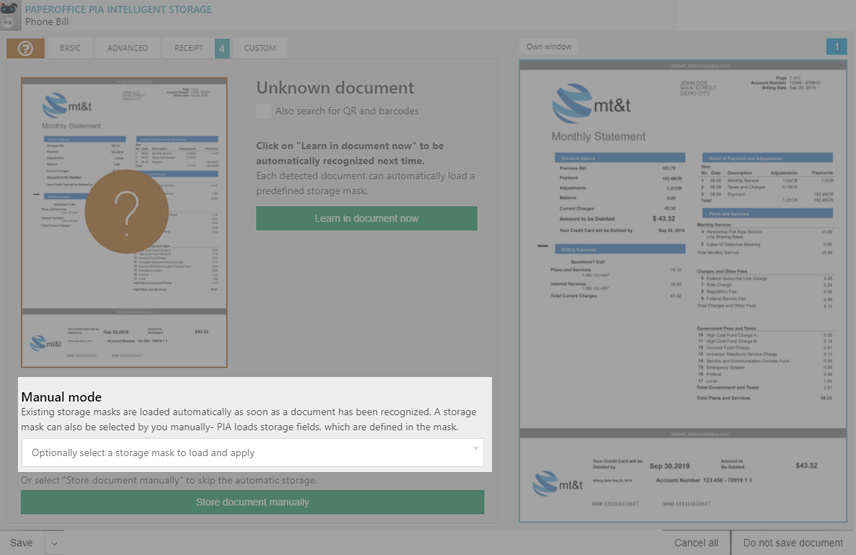
Storage masks can not only be triggered automatically by learned-in document templates - they can also be selected manually in the PIA storage dialog.
To create a new filing mask or manage existing ones, go to your settings and select „Automation and rule management“. In the "Storage masks" area, click on "Manage storage masks".
Click on “Create new storage mask” to create a new storage mask.
Now you can, among other things, define the basic properties of the document, such as the document name, dates, notes.
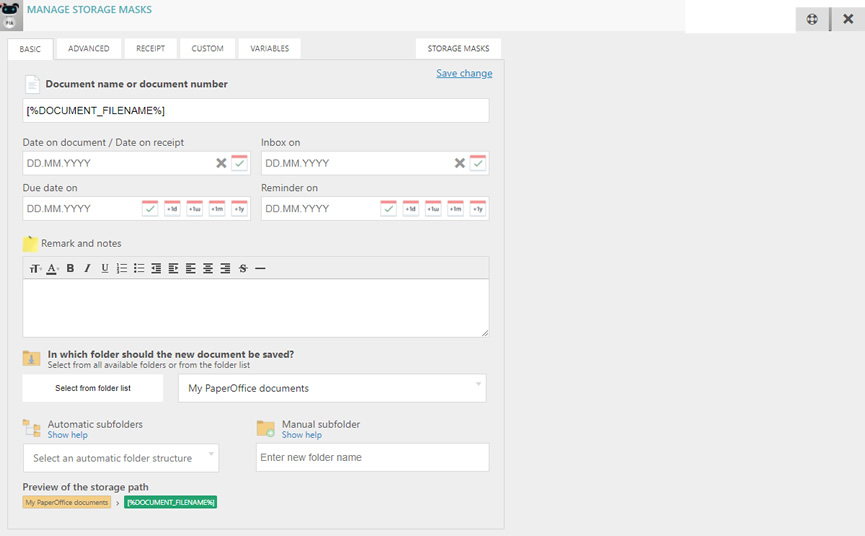
Various variables, which can be called up under the "Variables" tab, are available to you. Clicking on the symbol to copy (to the right of the individual variables) takes the corresponding variable into your clipboard.
For example, you can store a variable such as [% DOCUMENT_FILENAME%] in the „Document name or document number“ area to automatic transfer of the file name without a file extension when the storage mask is triggered.
You can also manually store a unique document name. In this way, all documents that are assigned to this storage mask will receive this document name.
A variable, such as "[%TODAY%]", can also be stored in the area of the dates in order to implement the automatic date entry when the document is saved.
You can also choose an explicit date manually. If you want to resubmit a document in 7 days, you simply have to enter the variable "[%TODAY+7days%]".
In the "Remark and notes" area you can store any notes that appear after the document storage as a yellow Post-it next to your document.
In the area of the storage location you can define where the document should be stored with this storage mask.
Click on "Select from folder list" and select a folder for it.
Among other things, you can also create "Automatic subfolders", such as Year/Month and create a manual folder without leaving the administration mask.
The preview of the storage path is updated accordingly.
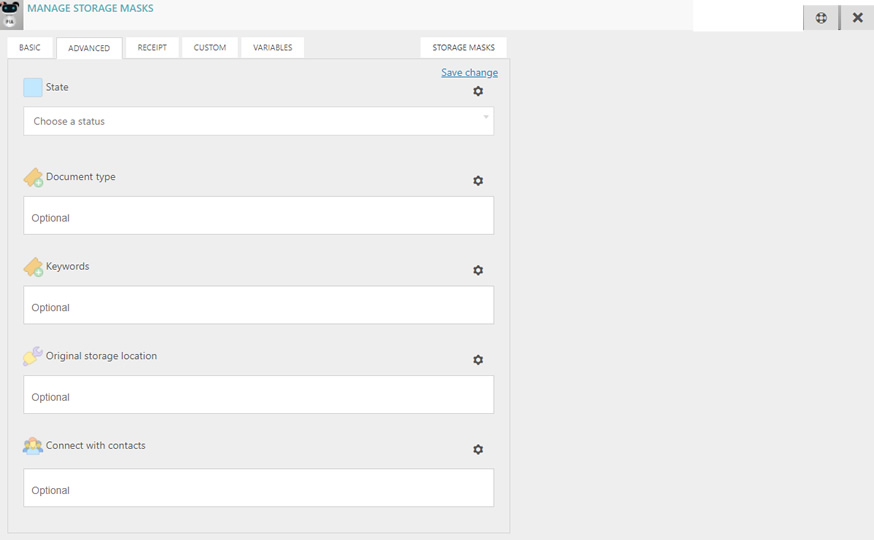
Further document properties are defined under the "Advanced" tab. In this way, the documents that are assigned to this storage mask will have the status, e.g. "In process", document type "Invoice" and the keyword "Unpaid" with the document properties you have defined.
Every document added after PaperOffice is largely tagged by the PIA AutoFill. This powerful module tries to automatically identify certain amounts and fields in advance and to save them under the "Receipt" tab. Of course, you can manually add additional fields that could be relevant for your tax advisor and account assignment, for example.
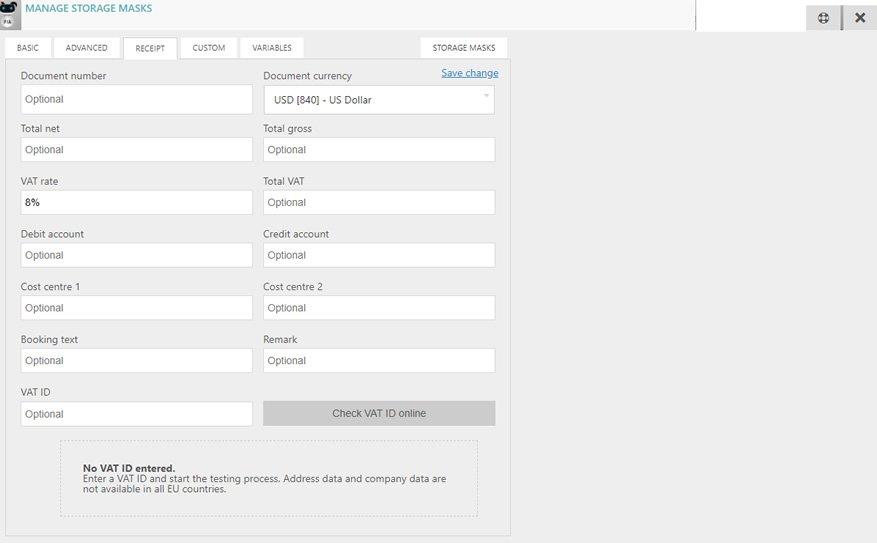
However, you can also add document-specific variables that you saved when learning in the document templates.
How you record receipts and provide them for your tax advisor is explained in a video, which you can find in our YouTube Channel or by using the direct Link.
User-defined document properties can be stored under the “Custom” tab. You can also create or edit new fields by clicking on “Edit custom fields”.
Please note that storage masks only support custom fields of the Text type.
After all relevant document properties have been saved, save your changes by clicking on "Save changes".
Edit storage masks
To edit a storage mask, select it under the "Storage masks" tab and switch to the corresponding tab under which you want to edit the entries. Don't forget to save the changes.
When is the storage mask triggered?
A storage mask is triggered if, as already described, it is selected manually or if it is connected to the document template. Because as soon as the document with the learned-in document template is added, PaperOffice PIA recognizes the document template and, if connected, triggers a storage mask.
How do I connect a document template to a storage mask?
To connect the document template with a storage mask, go to the document template management mask, click on the corresponding entry of a document template to which you want to assign the storage mask, click in the dropdown list "Connected storage mask" and select a storage mask.
The symbol under "Storage mask" changes from the red crossed out to the green checkmark.
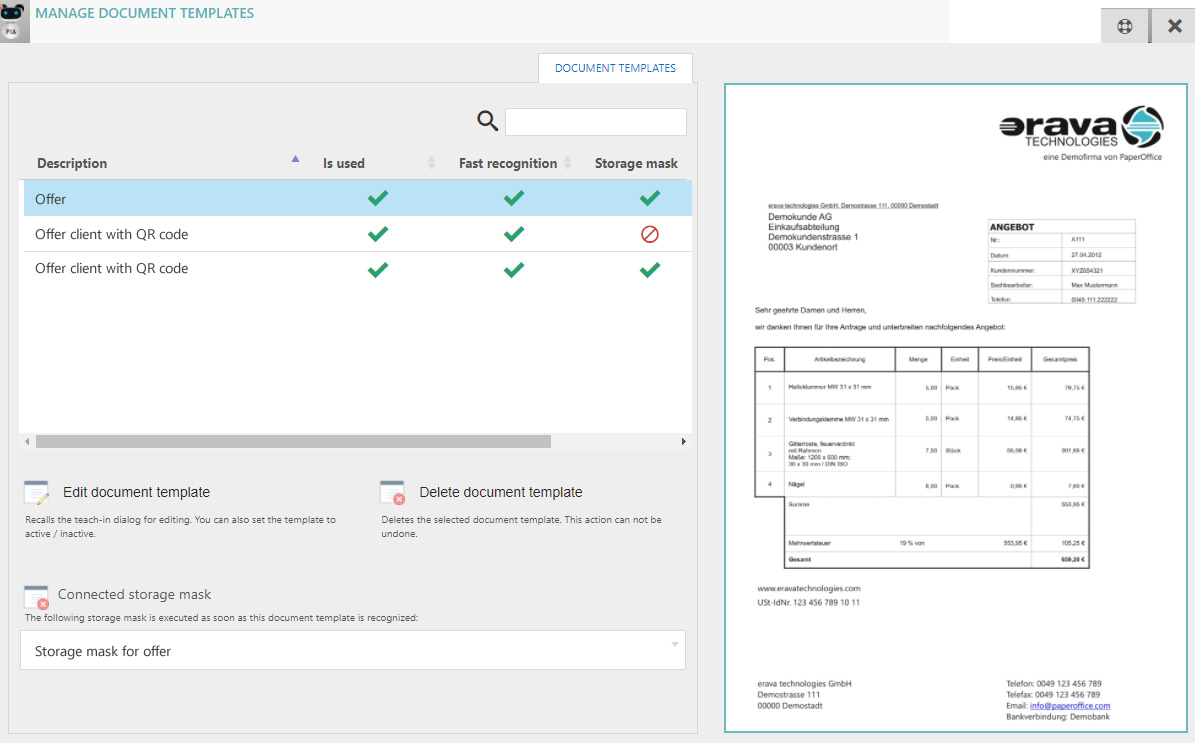
After the document template has been linked to the storage mask, you can choose whether the storage mask should be triggered automatically or after your confirmation.
The PIA detection mode ensures this. To automatically trigger the filing mask, click on the PIA icon in the menu bar and select "Do not display storage dialog".
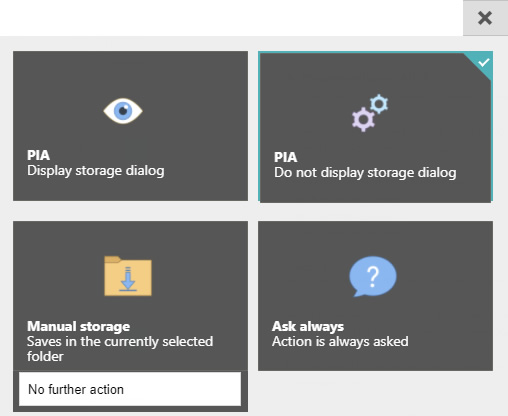
When the document template is recognized, the assigned filing mask is executed accordingly in the background.
If you would like to check all the data again before storing, select the " Display storage dialog" mode.


